
30/11/2011 – 6/12/2011 Apollo Bay – Marengo – Hayley Point – Elliot Ridge – Blanket Bay – Parker Spur – Parker Inlet – Point Franklin – Cape Otway – Point Flinders – Station Beach – Aire River – Glenaire – Castle Cove – Dinosaur Cove – Johanna Beach – Milanesia Beach – Ryans Den – Cape Volney – Wattle Hill – The Gables Lookout – Wreck Beach – Devils Kitchen – Moonlight Beach – Old Coach Road – Gellibrand River – The Twelve Apostles – Glenample Homestead
Great Otway National Park, VICTORIA
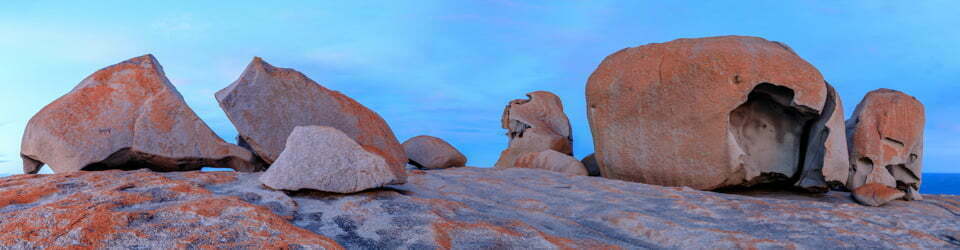
Twelve Apostles Marine National Park, VICTORIA
Gadubanud country
Distance: 95km Total Ascent: 3790m Total Descent: 3730m Time: Not recorded
Participants: Stephen Davies (Photos, Report), Sue Davies, John Louis, Alan Toomey, Dave Whitelaw
Information on NSW National Parks signage along the way
Day 1: Wednesday 30/11/2011 Apollo Bay – Blanket Bay
Max elevation: 245 m
Total climbing: 832 m
Total descent: -813 m
Average speed: nan km/h
Report Image 850L z18 —> JPEGmini [OPT+3]
Great Ocean Walk Stage One
Stage One:
Start: Apollo Bay Visitor Information Centre
Finish: Elliot Ridge hike-in Campsite
Distance: 10.3km
Duration: 4 hrs
Difficulty: Hard
The Great Ocean Walk Stage One starts at my favourite Great Ocean Road Town, the beautiful Apollo Bay, at the Visitor Information Centre. It starts off easy enough with a casual stroll along the Apollo Bay foreshore, past the Apollo Bay Surf Life Saving Club before leaving the township. After crossing the Barham River bridge you follow Mounts Bay around towards Marengo. This is about as easy as it gets along the entire hike, so you’re eased into what’s to come. You then continue on to Cape Marengo (Hayley Point) where you can take in some magnificent ocean views out to Marengo Reef.
After some more coastal walking, you begin to climb as you venture into Eucalypt forests and Fern gullies. From here to Shelly Beach there are a number of decision points. At low tide and calm seas, the coastal route is possible, or you can take the route along the low cliff tops overlooking Bass Strait.
This stretch is actually part of the Shelly Beach Circuit Walk, which is one of the most scenic short walks along the Great Ocean Road, so if you’re going to ‘cherry pick’, be sure to include this walk! Once at Shelly Beach, it’s a short climb to Elliot Ridge hike-in campsite.

Great Ocean Walk Stage Two
Stage Two:
Start: Elliot Ridge
Finish: Blanket Bay hike-in campsite
Distance: 13.3km
Duration: 5 hrs
Difficulty: Hard
The Great Ocean Walk Stage Two begins at Elliot Ridge and takes you to the Beautiful Blanket Bay, some 13km away. The walk to Blanket Bay from Elliot Ridge is almost completely inland, with occasional coastal views. It is quite steep in places so take care. You venture into lush eucalypt forests along Parker Rd, Johnson Track and Blanket Bay 4WD tracks before heading south, back towards the coast along Telegraph Track and down to Blanket Bay. A few kilometres further and you’ll reach Blanket Bay hike-in campsite. It’s a difficult, but straight forward stage, with a great reward at the end. Blanket Bay is tucked away in an isolated pocket of coastline. It’s one of the hidden treasures of the Great Ocean Road and a highlight of the Great Ocean Walk.
The shoreline is unspoilt as far as you can see, and the bay’s beautiful rock ledges come to life in the right lighting conditions, offering a seemingly endless array of patterns and interesting angles to photograph.
The only hints of civilization is the old storage hut ruin. A stone chimney is the only thing that remains of the old hut, once used to store lighthouse supplies coming in from the sea to supply the nearby Cape Otway Light station. The light station itself is a must-see Great Ocean Road attraction, so be sure to visit!
Car shuffle on previous day
Left car in caravan park and walked from Apollo Bay in order to be able to say we did the whole trip. From leaving the road to joining the walking track and then the night’s campsite proved to be a very long day. Starting with sections across rock platforms with remarkable rock formations then leaving the beaches up a steep set of steps into the forrest. Along this section we first walked along track before joining a firetrail which ran roughly parallel to the beach but inland. Along this we had time for a few chats, discovering that Alan’s choice of pack …rigid wheels bag recommended to him by the staff in the “outdoors” shop he had gone to to get advice from.
Also along this road I was concerned at one point with Alan’s desire to head off track to investigate the guttural grunting sound emanating from somewhere in the thick of the bush. It was another day or so before we figured out the source of the sound.
After a few rain showers along the road we turned off towards the wsw along a track which was to lead us back done to the coast.
Hot and humid, soggy underfoot.
To add direct (bookmark) link to an individual day
In Text Tab: Find “Day” & immediately after fullstop above add (on own line)
<em id=“1”> </em></span></span>

Day 2: Thursday 1/12/2011 Blanket Bay – Cape Otway
Max elevation: 108 m
Total climbing: 411 m
Total descent: -327 m
Average speed: nan km/h
Report Image 850L z69 —> JPEGmini
Information on Victorian National Parks signage along the way
Eric the Red (1880)
The ships Eric the Red and Loch Ard (1878) were both bound for Melbourne with goods for the 1880 International Exhibition when their journeys ended tragically along the Shipwreck Coast.
Marvellous Melbourne on the world stage, 1880
The 1870% was a decade of immense change and expansion in Melbourne, then the greatest city in Australia in the months leading up to the opening of the Exhibition in October 1880 an endless stream of goods and exhibits arrived from every corner of the world
A clipper sets sail – bound for disaster
Eric the Red a fine wooden ship of 1580 tons built at Bath, Maine, USA in 1871 left New York on 12 June 1880 with 25 crew and two saloon passengers, and a cargo of silver plate, pianos, choice tobacco and much more.
In heavy haze on the early morning of 4 September she struck the Otway Reef near here, and was in pieces in 15 minutes.
The wreck claimed four lives: those of carpenter Gus Dahlgren, Fourth
Mate James F. Lawrence, cook John French and passenger Thomas Monk. buried at Cape Otway Cemetery Fortunately for the other men the coastal steamer Dawn, bound from Melbourne to Warnambool, was passing Cape Otway when the provedore heard cries of distress. Six survivors were picked up from a small boat and 17 from a piece of floating wreckage
The beach is all covered with things!” in her book Shipwrecks (1954) Margaret Mackentie recalls
One morning soon after this wreck we children went down to the beach hear
our home to find it covered with wreckage My oldest sister, running back with
eyes as big as saucers called out – The beach is all covered with things.
Much of the wreckage was pilfered before police and customs officers arrived.
The wreck and remaining cargo were sold to a Melbourne man, but as the
Portland Guardian (7 September 1880) painted out visitors to the Exhibition
were deprived of the opportunity of examining some of the grandest mechanical productions of the greatest inventive nation on earth’.
Visit Cape Ofay
Lightstation and Warnambool’s Flagstaff Hill Mantime Village for insights info the adventures. Tragedies and experiences of the Shipwreck Coast, and ask for the Shipwreck Trail map guide
City of Rayville (1940)
An explosion was heard at Apollo Bay and a rescue fleet put out into the hazardous choppy sea..
Victim of a minefield
The 3666 ton American motor vessel City of Rayville was carrying lead,
wool and copper from Port Pirie (SA) to New York. Passing Cape Otway
on the evening of 8 November 1940, the vessel struck a German mine
and sank in 25 minutes. This was the USA’s first vessel lost in World
War II, although the country did not enter the war until December 1941.
An SOS was radioed and the lifeboats lowered. Captain Cronin and 36
of the crew were able to escape. Sadly, an engineer who returned to
his locker for belongings drowned.
People at nearby Apollo Bay heard the explosion. A rescue fleet of fishermen put out into the hazardous choppy sea and located the lifeboats, and all returned safely to Apollo Bay – where the rescue is still remembered and commemorated. The wreck site was identified in 1999.
Mines in Bass Strait
The sinking of the City of Rayville followed that of the British cargo ship Cambridge off Wilsons Promontory only 24 hours before, which also hit a mine. Bass Strait was closed to shipping until minesweepers cleared the sea.
Between 29 and 31 October the former Norwegian tanker Storstad, captured by the German raider Pinguin and renamed Passat, had laid 110 mines in and near Bass Strait. The busy sea lane between Cape Otway and King Island was a highly strategic target. Before being sunk on 7 May 1941, the Pinguin sank 12 ships and captured 16.
War comes to Australia
As far back as the 1850s the Victorian colonial government had fortified the entrance to Port Phillip to protect Melbourne. Periodically modernised, these defences were manned until 1946. You can still explore them today at Queenscliff and Point Nepean.
Although far from the first major war theatres of World War II. Australia was not immune from attack. Its raw materials were strategically important and its long coastline was hard to defend.
The Bass Strait mines and the sinking of merchant vessels, the submarine attack on Sydney and the Broome and Darwin air raids brought Australians face to face with war at home.
TIMELINE
29-31 Oct 1940 Storstad (renamed Passat) laid mines along Bass Strait
7 Nov 1940 Cambridge sinks off Wilsons Promontory
8 Nov 1940 City of Rayville sinks off Cape Otway 12 Nov
1940 – HMAS Goorangai tragically collides with MV Duntroon In Port Phillip Bay
7 May 1941 German raider Pinguin sunk
Dec 1941 USA enters war
1999 City of Rayville wreck site identified
Great Ocean Walk Stage Three
Stage Three:
Start: Blanket Bay
Finish: Cape Otway hike-in campsite
Distance: 11.4km
Duration: 4 hrs
Difficulty: Medium
The Great Ocean Walk Stage Three starts at Blanket Bay, and takes in the magnificent Parker Inlet, Point Franklin and Cape Otway.
Before proceeding, please be sure to clean your shoes at the Phytophora cleaning station at blanket bay, and again at Point Franklin to reduce the spread of floral disease. The first 4km is through coastal woodlands to the amazing Parker Inlet. From the Parker Inlet lookout, it’s a steep descent to the river itself. Parker Inlet is simply stunning, and full of photographic promise (the photographer talking again). It’s really like no other place along the Great Ocean Walk. After crossing the parker river, take some time to stop and take in the scenery before deciding to take either the coastal or inland route to Point Franklin.
Coastal Route – yes
The coastal route involves a number of rock scrambles, and is only possible at low tide and calm seas, so check conditions beforehand.
Inland Route – no
For the inland route, you tackle an equally steep climb up the other side, and through eucalypts and coastal scrub, then finally along the clifftops to Point Franklin.
From point Franklin it’s a straightforward walk along a vehicle track to Parker Hill. From here you travel West through manna gum forests which are home to many Koalas, before you reach Lighthouse Rd. From here you walk on the track alongside the road to the Cape Otway Lightstation, then on to the Hike-in campsite for the night.
From Blanket Bay we followed the coast? to Parker Inlet and Mirage Falls??? Moving inland to cross Point Franklin
Passed a couple of koala colonies during the day which provided a closeup view of the interactions between koalas in the wild. Along this section of coast the koala population is very high, causing concern about the stress they are placing on their natural habitat to the extent that relocation and culling had been mentioned.
Our campsite for the night at Cape Otway Hikers Camp was amongst one of the heavily populated koala colonies. Here we were to learn that the noises we had heard coming from the bush on day one was indeed coming from Koalas.
Day 3: Friday 2/12/2011 Cape Otway – Aire Beach
Max elevation: 102 m
Total climbing: 320 m
Total descent: -411 m
Average speed: nan km/h
Report Image 850L z44 —> JPEGmini
Great Ocean Walk Stage Four
Stage Four:
Start: Cape Otway
Finish: Aire River hike-in campsite
Distance: 9.8km
Duration: 4 hrs
Difficulty: Medium
The Great Ocean Walk Stage Four starts at the historic Cape Otway Lighthouse carpark, and finishes at the Aire River Bridge (and my favourite camping spot, but that’s another story). This section of the walk is one of my favourites, and includes the Cape Otway Cemetery, Rainbow Falls (as a separate side trip), isolated beaches and the stunning Aire Valley.
From the carpark, follow the signs north to the Cape Otway Cemetery, passing an impressive lookout to the Cape Otway lightstation, and also the hike in campsite along the way. If you’re looking to see some Koalas, they are often sighted in the manna gum trees at the Campsite. The Cemetery is a small clearing which contains the graves of light keepers’ and their families, and shipwrecked sailors. The before mentioned lookout displays the story of one such shipwreck, the SS City of Rayville.
From the cemetery, you take in sand hills followed by stunning ocean views as you walk along the cliff tops high above the waves. This is a particularly stunning and rugged stretch of coastline, with some side tracks and vantage points for potentially stunning ocean photography (the photographer talking again!).
You’ll reach a junction where the Great Ocean Walk track splits left to Station Beach, or inland to the right. You may notice horse tracks on the track to the right, heading back up the hill. This heads back to Bimbi Park, where you can take a horse riding tour.
At Station Beach, you can choose to turn left and walk back along the beach to Rainbow Falls, a 3km diversion, or turn right and continue along the beach.
You eventually arrive at Aire River and head inland along a sandy 4WD track to the Aire River Bridge. You will get glimpses of the river moth along the way (looking over your shoulder) which are simply stunning. This whole valley is stunning; I have many fond childhood camping memories of this place, and it’s a highlight of the Great Ocean Walk.
Left the lighthouse travelling inland along sandy tracks through low coastal heath. Before emerging taking the coastal route onto Station Beach after some heavy surf as evidenced by the incoming waves bringing in foam on part so the beach.
Back inland and over through more low heath before walking over the crest of the ridge to gain views of Aire River where we camped at Aire River East Campground.
Day 4: Saturday 3/12/2011 Aire Beach – Johanna Beach
Max elevation: 125 m
Total climbing: 585 m
Total descent: -578 m
Average speed: nan km/h
Report Image 850L z37 —> JPEGmini
Great Ocean Walk Stage Five
Stage Five:
Start: Aire River
Finish: Johanna hike-in campsite
Distance: 15km
Duration: 5.5 hrs
Difficulty: Medium
The Great Ocean Road Stage Five starts at the beauitful Aire River and takes in Castle Cove, coastal woodlands and popular surf spot Johanna Beach.
From the Aire River bridge, it’s a climb past the Great Ocean Walk campsite and along stunning clifftops to Castle Cove. The views from up here (particularly of the river) are just amazing, so keep your camera handy!
At Castle Cove you can walk up the steep track to the viewing platform adjacent to the Great Ocean Road itself. Here you can read about dinosaurs that inhabited the area millions of years ago. Other than at the start of the walk at Apollo Bay, this is the only place along the walk with direct access from the Great Ocean Road.
From the lookout, there’s more cliff top hiking, with views of Dinosaur Cove and further along the coast. You continue on Dinosaur Track and Rotten Point Track (rotten point seemed aptly named for me as a child, due to cutting my big toe open there while fishing with my dad), before crossing Browns Creek.
The creek marks the eastern edge of Johanna Beach, a popular surfing and fishing spot, and one of my favourite places. It’s a further couple of km’s along the beach and across Johanna River to the Johanna Beach Campground.
I’ve spent plenty of time here with my own children (pictured above, and much younger!), and if you’re looking for a great spot for a lazy afternoon, there’s good access from The Great Ocean Road, which is a few Km’s away.
The surrounding area is known for it’s bald rolling hills (which looked kind of like sleeping green elephants to me as a child!) which make for very interesting photos.
From camp we returned along the track towards the ocean to cross Aire River at the footbridge. From here we climbed back uphill walking through open heathland to Castle Cove Lookout which has vehicle access from the adjacent Great Ocean Road.
Now walking for some distance through forest?? Until coming out onto Johanna Beach
Camped the night at Johanna Beach Campground.
Day 5: Sunday 4/12/2011 Johanna Beach – Ryans Den
Max elevation: 281 m
Total climbing: 756 m
Total descent: -669 m
Average speed: nan km/h
Report Image 850L z31 —> JPEGmini
Great Ocean Walk Stage Six
Stage Six:
Start: Johanna Beach
Finish: Ryans Den hike-in campsite
Distance: 14.8km
Duration: 5.5 hrs
Difficulty: Hard
The Great Ocean Walk Stage Six Starts at Johanna Beach and terminates at the isolated Ryan’s Den walk-in campsite. This has to be the most unique campsite of the entire Great Ocean Walk, with one particular tent site offering one of the best ocean views of any place I’ve seen.
The majority of the walk is inland along vehicle tracks, and is not exactly the highlight of the walk, but the hike into Ryan Den from Milanesia Beach certainly makes up for it!
From the Johanna Beach Great Ocean Walk campsite (also with stunning views), you hike through the lush rolling hills above the Johanna River Valley. You will pass through a series of gates, which are there to keep grazing cattle from wandering off (be sure to leave the gates as you find them when passing through).
Continue down Old Coach Road to Hiders Access Road, which is a particularly steep section, and then left onto Milanesia Track. Continue through the heathland, which offers the occasional coastal view, before descending into a tall and equally stunning Eucalypt forest as you approach Milanesia Beach. This is where the scenery starts to change significantly.
Continue down to Milanesia Beach, being careful as you cross Milanesia Creek. This beach is one of the hidden wonders of the Great Ocean Road. The sense of isolation and sheer untouched beauty is something else! It’s also here that you will find the cannonball rocks.
If weather and conditions permit, you can continue along the beach, or take the inland route, which meets up with the beach track a kilometre later. The scenery here is some of the best along the Great Ocean Walk, but the elevation changes make it also one of the most difficult small sections. After several climbs and descents, you finally ascend to Ryan’s Den hike-in campsite.
Day 6: Monday 5/12/2011 Ryans Den – Devils Kitchen
Max elevation: 179 m
Total climbing: 535 m
Total descent: -521 m
Average speed: nan km/h
Report Image 850L 30 —> JPEGmini
Great Ocean Walk Stage Seven
Stage Seven:
Start: Ryans Den
Finish: Devils Kitchen hike-in campsite
Distance: 15.3km
Duration: 5.5 hrs
Difficulty: Hard
The Great Ocean Walk Stage Seven is the penultimate stage of this breathtaking 8 day walk, and takes in some of the best scenery the walk has to offer. After Leaving Ryan’s Den hike-in campsite, you quickly feel that you’re in for some hard work! This section is steep, winding and very beautiful.
After climbing and descending for several kilometers, the track levels off a little as it joins with Cape Volney Track. Further on you’re climbing again, this time through some grazing land and onto Parkers Access Road and Moonlight Head Road.
At Old Coach road, you need to choose either the inland route or Wreck Beach route. Check weather and tides and proceed with caution if you choose the Wreck Beach route (which I recommend to do if conditions permit). The inland route is straightforward, and uninteresting, but will get you to Devil’s Kitchen Hike-in campsite quicker and with less effort.
The beach route continues along Moonlight Head Road to the Gables Carpark. The Gable Lookout is a short diversion walk offering stunning coastal views of the ocean and reefs around Moonlight Head. This is one of the highest sea cliffs on mainland Australia, and the views are spectacular.
Returning from the lookout, you take the track left which connects with the 366 steps (yes 366!) down to Wreck Beach. The walk down to the beach is strenuous, and it will give your legs and knees a very good workout.
Wreck Beach is, for me the highlight of the walk, probably in part because of the photogenic ships anchors of the Fiji and Marie Gabrielle shipwrecks, but also because of the sheer isolation and beauty. At the other end of the beach, it’s a good climb up to Devil’s Kitchen Hike-in campsite.
Day 7: Tuesday 6/12/2011 Devils Kitchen – Glenample Homestead
Max elevation: 126 m
Total climbing: 356 m
Total descent: -413 m
Average speed: 0.00 km/h
Report Image 850L z13 —> JPEGmini
Great Ocean Walk Stage Eight
Stage Eight:
Start: Devils Kitchen
Finish: Glenample Homestead
Distance: 14.1km
Duration: 5 hrs
Difficulty: Medium
The Great Ocean Walk Stage Eight starts at Devil’s Kitchen hike-in campsite, and terminates at the Historic Glenample Homestead some 14km away.
After leaving the Devil’s Kitchen campsite, turn left along Old coach Road. The road is long, heavily eroded and very slippery after rain (I had the experience of walking the last section during heavy rain, and it wasn’t exactly fun).
You can see the Gellibrand river as you approach Princetown, and it gives you an idea of how far you still need to walk, as the river mouth meets the ocean at this tiny township. After what seems like forever, you reach Princetown. It’s not much more than a general store and a few houses, but the river valley is quite beautiful. The short diversion walk to Princetown beach is worth the effort.
After crossing the Gellibrand River, continue through the wetlands and across the boardwalk and back onto the continuation of Old Coach Road. You will travel through sand dunes and into Port Campbell National Park.
After walking along the cliff tops above Clifton Beach for a little while, you will be treated with a stunning view looking towards Gibson Steps and the 12 apostles before the track turns inland, and on to Glenample Homestead.
Day 8: Wednesday 7/12/2011 Loch And Gorge
Clickable icons on a world map which open the related trip report
A detailed, searchable trip list with links to reports, photo galleries and other content
![]()